Sprouts are little nutrient bombs & you can easily grow them yourself at home, also good for your environmental footprint, there’s no plastic packaging or transportation!
Raising sprouts is simple, and it’s satisfying to see something grow so fast. But it’s not only fun: it’s also a super-healthy, super-affordable, super-delicious, and versatile vegetable, in fact a true superfood.
Sprouts are true nutrient powerhouses: loaded with vitamins, plant secondary metabolites, enzymes, minerals, essential trace elements, fibre, polyunsaturated fatty acids and spermidine. It makes sense that foods with the highest concentration of vital substances include sprouts and microgreens. There are many reasons to include sprouts in your diet on a regular basis, and when prepared properly, they are also incredibly tasty.
Spermidine baby!
The word sounds a bit strange at first. So what is it? In a nutshell, Spermidine is a natural substance that essentially exists in all living things. Spermidine is regarded as essential to maintaining youth. By encouraging the cells’ natural ability to clean themselves, the substance keeps them vibrant and healthy. Spermidine becomes less available to the cells as one ages. Spermidine, according to researchers, may be able to reverse natural cell aging. The best way to obtain spermidine is through spermidine-rich foods, though some of our intestinal bacteria are also involved in its production when consumed. This includes foods like ripened cheese, mushrooms, whole grains or wheat germ (germ! ), soy products, and legumes. Since spermidine is still a relatively new area of nutritional research, it is not yet known how much of it each food contains. However, current knowledge places sprouts and germs far ahead. The Ring Sisters blog is a good place to find some spermidine-rich recipes and read a lot more about it. It’s one of my favorite Austrian blogs that focuses solely on the subject.
What is the best way to grow sprouts?
There are several ways to grow sprouts, probable the sprouting jars is the most popular. They are just very handy. I find a sprout jars especially useful for growing: radishes, broccoli, beets, mustard, clover, cress, or fenugreek, in particular pretty: beets. But I prefer to grow bean sprouts the “Asian way” (at least that’s what I learned from Asian blogs) in a pot or container with holes in the bottom. They grow nicely straight and even there, making them ideal for cooking or salads or added to stir-fries.
Good to know:
• Fresher beans or seeds will sprout more readily. Beans that are too old may be hard or impossible to germinate.
• Sprouts don’t always mature at the same rate; occasionally, you can harvest them on the fifth day or with an other batch it’s an the eighth day…
• Be cautious in the middle of summer as sprouts shouldn’t have temperatures that high. In winter, do not put on the heater. The ideal temperature range is 20 to 25 degrees Celsius (68 – 77 °F). It’s too hot at 30 °C (86°F)!
• Some people warn against eating raw soybean sprouts because they may contain germs. This is due to the fact that purchased sprouts frequently do not have adequate sanitary conditions, allowing microorganisms to end up on the sprouts. Wash bean sprouts thoroughly before eating, and to be safe, blanch them briefly or toss them briefly in heated butter or even better: miso butter. Because fat is a flavor transporter, the sprouts acquire a very exquisite flavor.

Equipment:
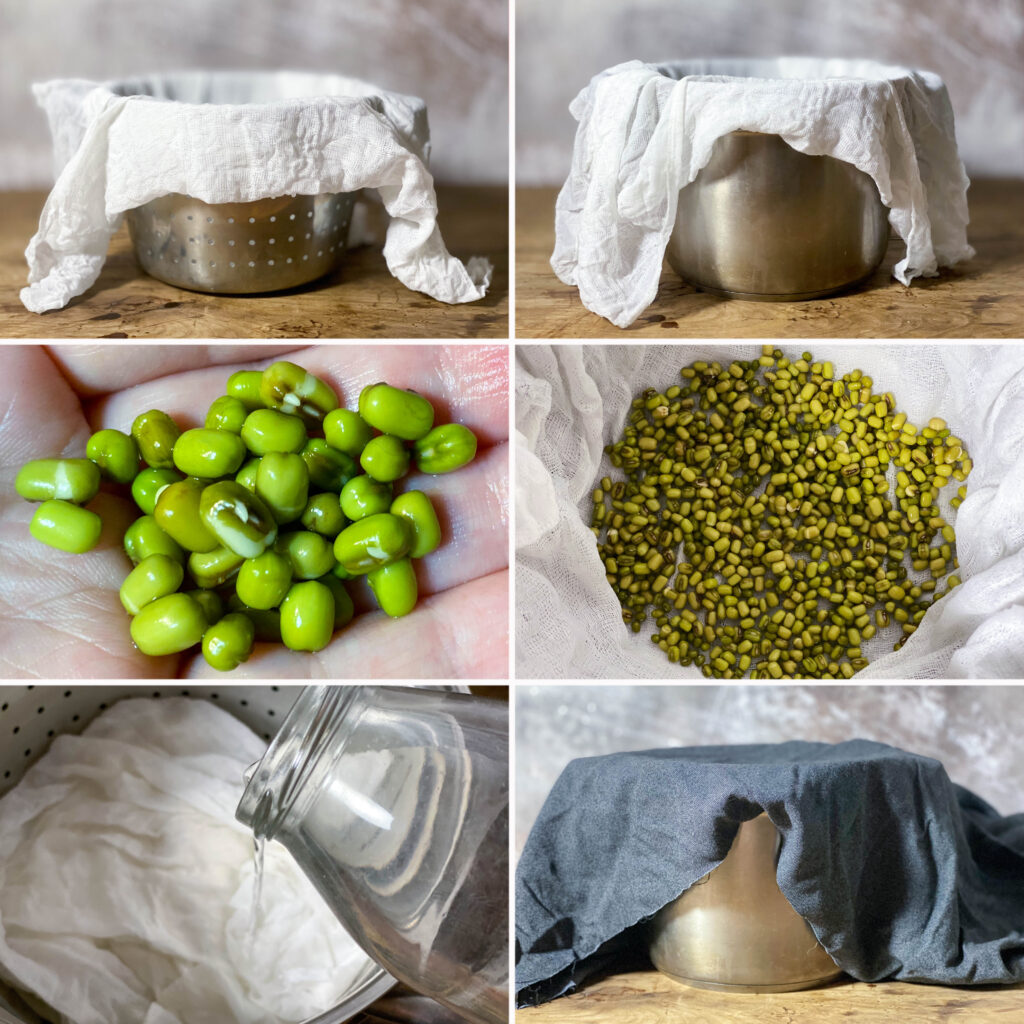
Container with holes, such as a colander or a pot with a steam insert & something to catch the dripping water
Cheesecloth or tea towel
Optional: dark, air-permeable cloth for covering
Grow your own bean sprouts – the best superfood comes from your own kitchen!
Difficulty: EasySprouts are little nutrient bombs & you can easily grow them yourself at home, also good for your environmental footprint, there’s no plastic packaging or transportation!
Ingredients:
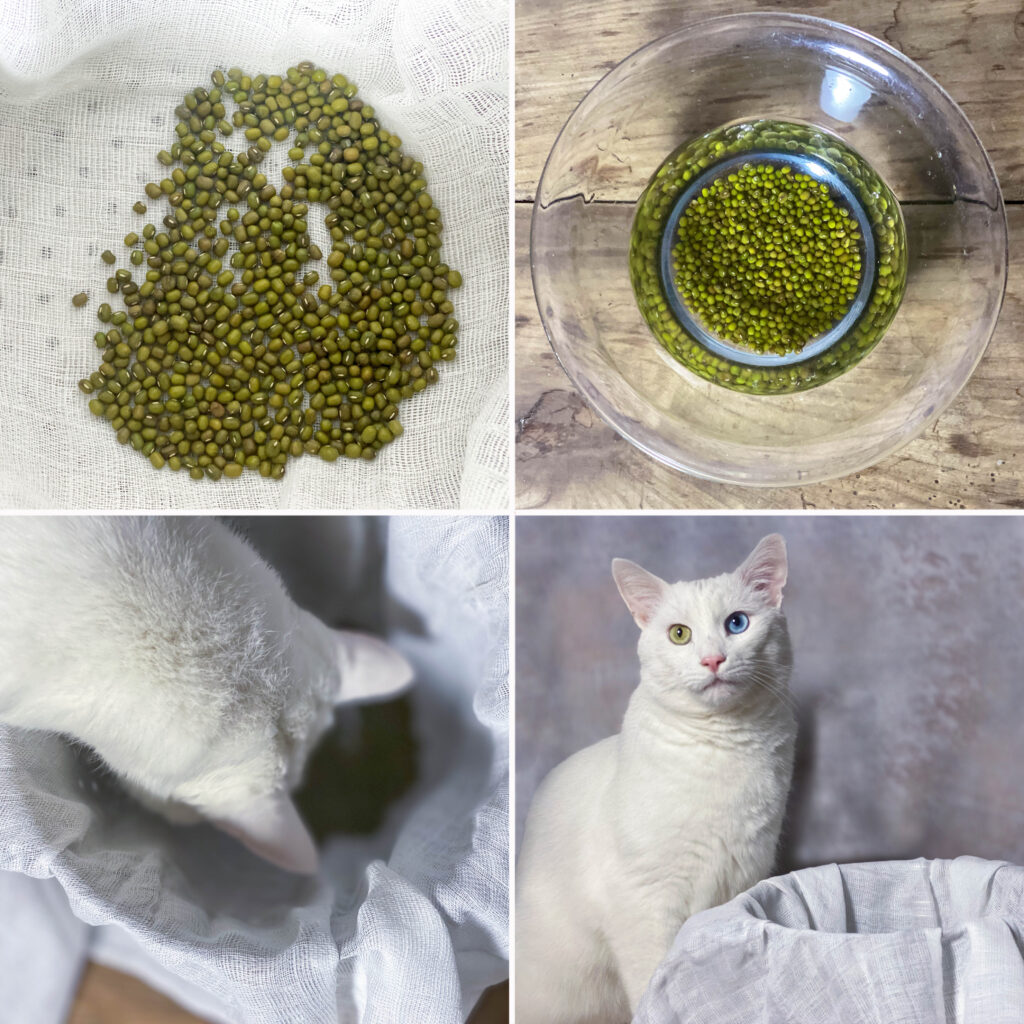
Mung beans
Also works with lentils, adzuki beans, chickpeas, soybeans, black beans, kidney beans or peas.
Directions:
- Day 01: Line the perforated container with cheesecloth and add enough mung beans to cover the bottom by 2/3. That many beans can sprout in this container.
• Wash mung beans several times, removing any broken or bad beans right away. - Day 02: Strain the beans. They have nearly doubled in size, and in a few cases, you can see a little germ.
• Wet the cheesecloth, then squeeze it until it is only barely wet. Put it inside the perforated container. Put a pot or bowl underneath to capture the runoff water. Every day, empty the standing water.
• I like my sprouts to be pale, so I drape a dark cloth over my sprouting station to let the beans grow in the dark and remain as white as possible. Yet, the dark cloth must be permeable to air since sprouts require oxygen. - Day 3–7: Water 1 to 2 times each day from now on. Then, constantly pour away the water; otherwise, bacteria can form, which is undesirable and smells bad.
- 🔁
- 🔁
- 🔁
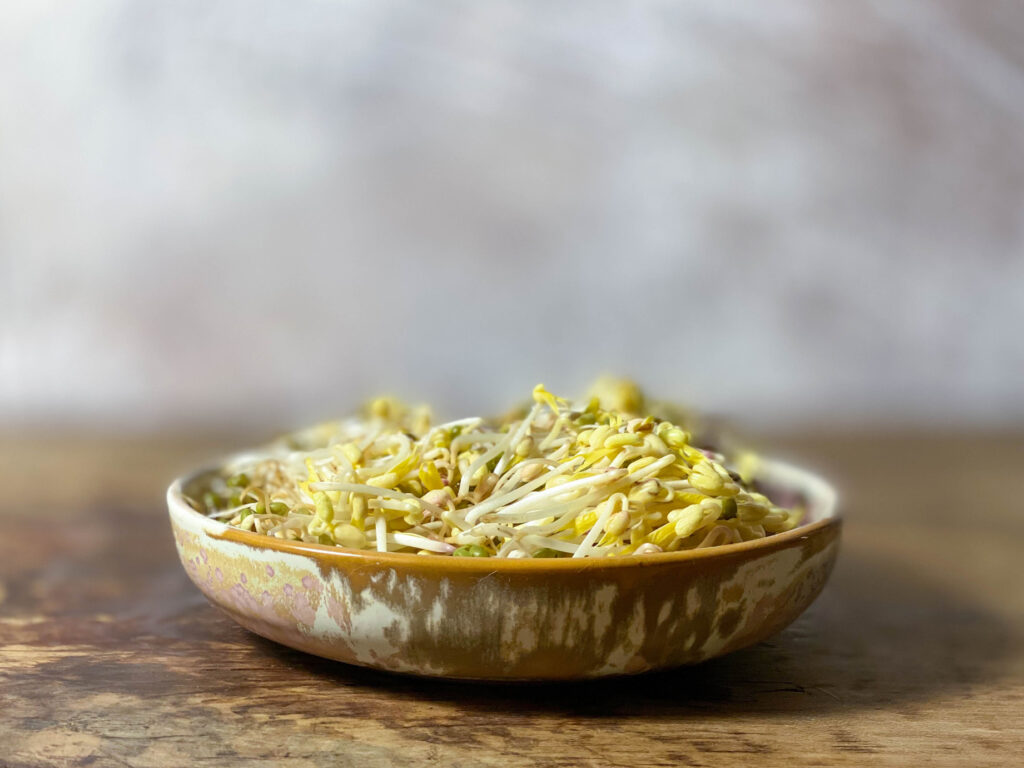
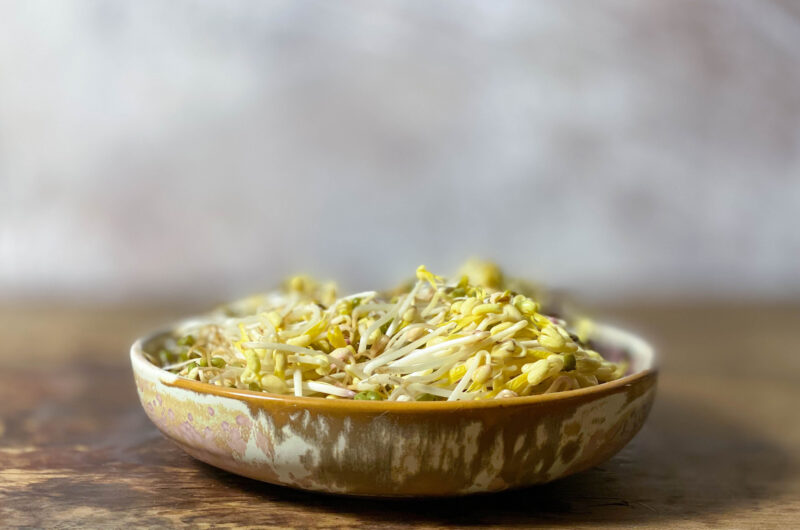
- Day 07: It’s harvest time! Do not be startled if the roots sprout through the fabric; you can cut them away if you choose, but you can also leave them on and eat them; they taste especially tender. The sprouts are washed again, and the green bean pods are roughly removed. They would spoil the sprouts.
• Bean sprouts are used right away. You can keep sprouts that you don’t need right away in the refrigerator. Up to 1 week in a sealable container.
Notes:
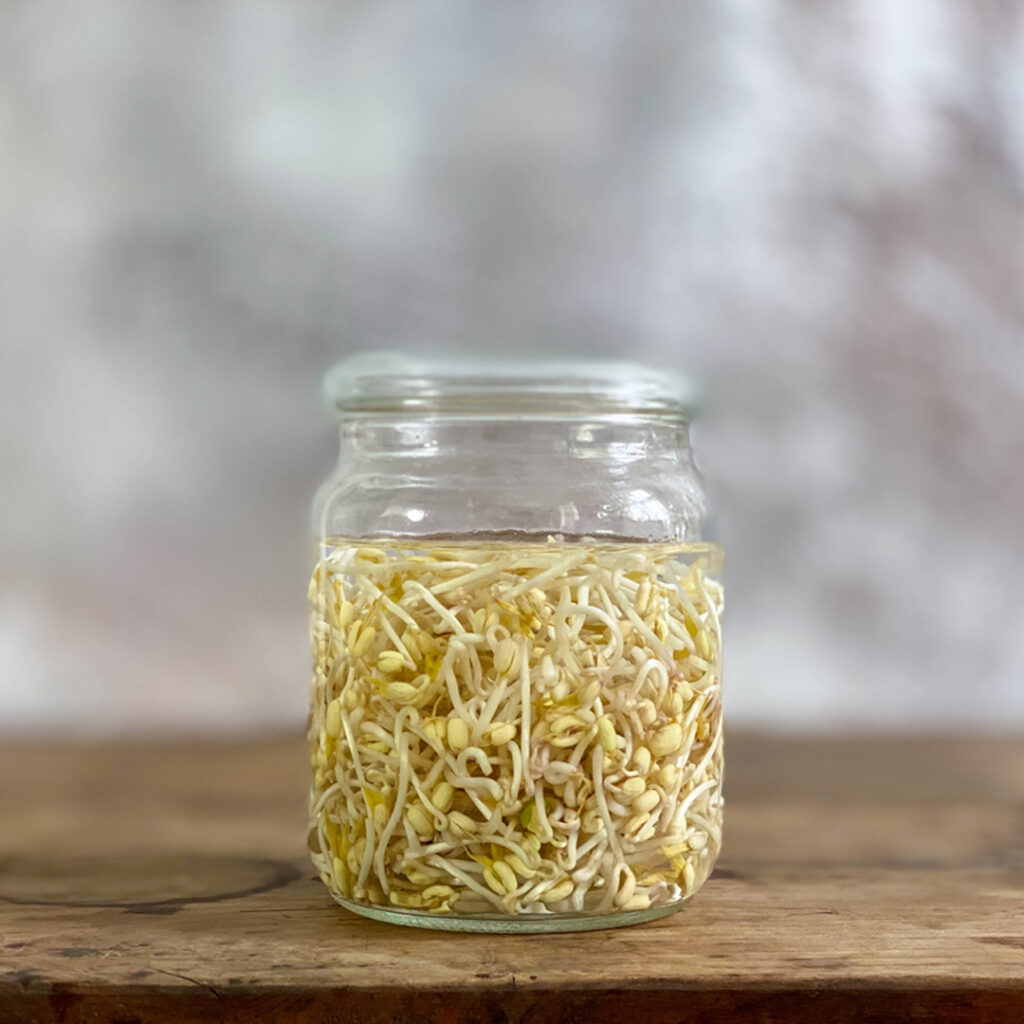
- This way bean sprouts can be stored for more than a week:
• Fill a bowl halfway with cold water, add 1 tablespoon of white vinegar, and wash the bean sprouts in it for 3 to 5 minutes. Remove all green shells while doing so; this is vital for shelf life.
• Put the sprouts in a sufficiently large, clean glass. Refill with clean water. Put in the refrigerator. You can store the sprouts in this manner for up to a month if the water is changed every 2 to 3 days.
Remove the bean pods (green) from the bean sprouts for extended storage:
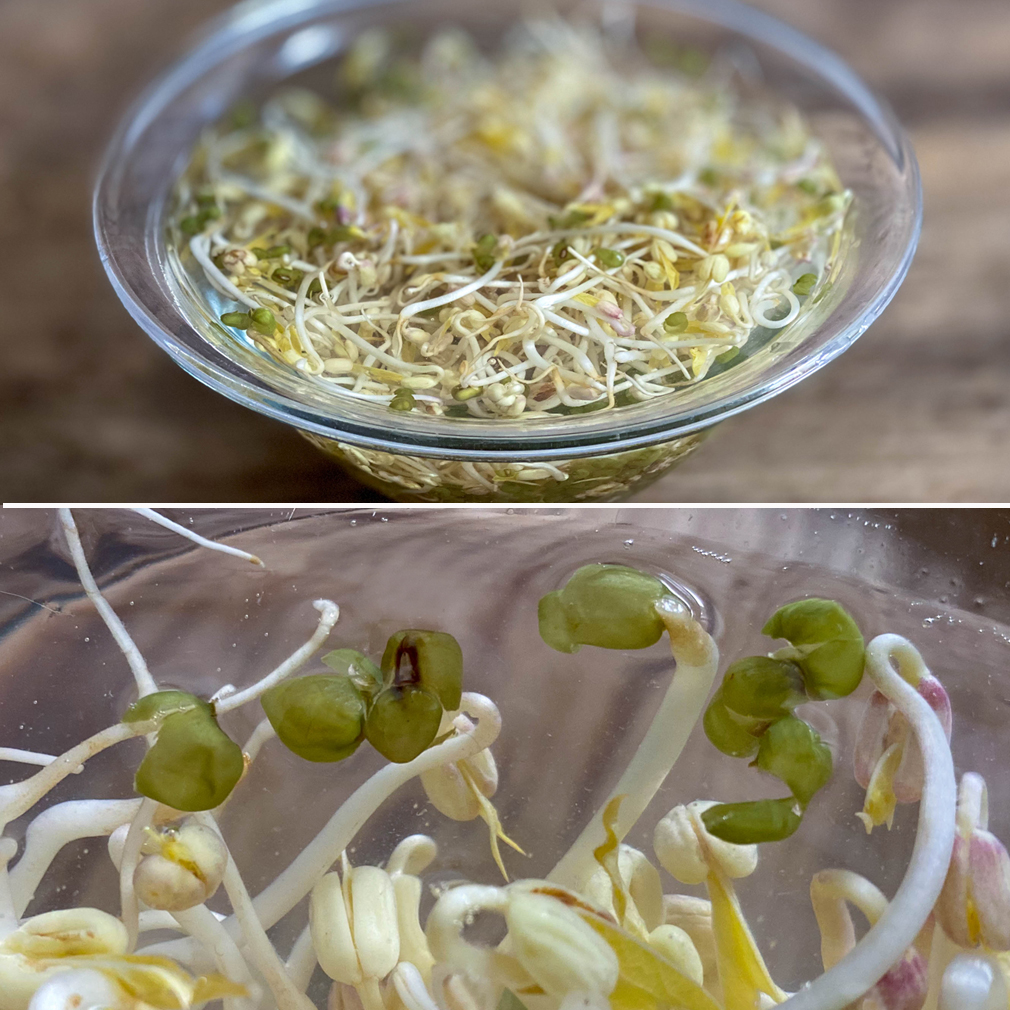
This way the jar is placed in the refrigerator: